

Food preservation skills for preppers matter because stored food only helps if it stays safe, useful, and worth eating. A pantry full of rice, beans, cans, and bulk staples gives you a strong start. Yet real food security grows when you can preserve what you already have, stretch seasonal harvests, reduce waste, and protect food before it spoils.
Preppers often focus on buying food. That makes sense, especially in the early stages. But long-term preparedness works better when you also know how to can, dehydrate, freeze, ferment, seal, and store food the right way. These skills turn garden produce, meat sales, farmers market deals, and everyday leftovers into a more resilient food supply.
Food preservation does more than extend shelf life. It gives you options. If the freezer gets too full, pressure canning may save space. If vegetables start coming in faster than you can eat them, dehydrating can turn them into soup ingredients. When dry goods go on sale, Mylar bags and oxygen absorbers can help protect them for longer storage.
The goal is not to master every method at once. A smart prepper learns one skill, practices it safely, and builds from there. Start with the foods your household already eats. Learn which preservation method fits each food. Keep notes, label everything, and test your results before you rely on them during an emergency.
Food preservation rewards patience and practice. Done well, it can save money, reduce trips to the store, add variety to your pantry, and make your wider survival skills for preppers stronger. It also helps turn a basic prepper food list into a working food system that can support your household through power outages, supply problems, bad weather, and rising prices.
Why Food Preservation Is an Essential Survival Skill
Food storage begins with buying supplies, but it should not end there. A prepper who can preserve food has more control over calories, variety, timing, and waste. That matters in everyday life, and it matters even more when storms, shortages, outages, or price spikes disrupt normal routines.
Food preservation helps you use what you already have. A garden harvest can disappear fast if you do not process it in time. Meat bought on sale can overload a freezer. Fruit from a local farm stand may last only a few days on the counter. With the right skills, those short-term opportunities can become shelf-stable meals, dried ingredients, frozen portions, ferments, or longer-lasting pantry supplies.
This skill also protects your budget. Preparedness can get expensive when every solution starts with another purchase. Preserving food gives you a practical way to build supplies over time. Seasonal produce, bulk dry goods, and discounted meat can all support a stronger pantry when you know how to handle them safely.
Food preservation also improves the quality of your long-term food plan. Many preppers store rice, beans, pasta, oats, and canned goods, which all have value. The problem comes when the pantry lacks flavor, texture, nutrition, and familiar meals. Dehydrated vegetables, canned meat, frozen meal portions, fermented foods, and cool-stored produce can make stored food more useful and easier to live with.
The best food systems use more than one method. Freezing works well for short-term convenience, but it depends on power. Mylar bags protect dry goods, but they do not turn those dry goods into complete meals. Canning creates shelf-stable food, but it requires careful safety rules. Dehydrating saves space, but moisture control matters. Each method has strengths and limits.
That is why food preservation belongs in the wider skill set of serious preppers. It supports bugging in preparedness, strengthens financial preparedness for preppers, and helps you avoid several common prepper mistakes. More importantly, it turns food storage from a static pile of supplies into an active system you can manage, rotate, and improve.

Understanding Food Spoilage and Food Safety
Food preservation works because it slows or stops the things that make food spoil. Bacteria, mold, yeast, enzymes, oxygen, moisture, heat, pests, and time all work against your pantry. Different methods control those risks in different ways.
Safe preservation starts with clean habits. Wash your hands, clean your work surfaces, use sound ingredients, and keep dirty water away from food. Jars, bags, lids, tools, and containers should all match the method you plan to use. A careless process can ruin good food before it ever reaches the shelf.
Temperature also matters. Cold slows spoilage. Heat can destroy harmful organisms when you use the right method for the food. Drying removes moisture. Fermentation uses salt, acidity, and beneficial microbes. Mylar bags and oxygen absorbers reduce oxygen for dry goods. Each method solves a different problem, so you need to match the method to the food.
High-Acid and Low-Acid Foods
Canning safety depends heavily on acidity. High-acid foods include many fruits, jams, jellies, pickles, and properly acidified recipes. These foods can often use water bath canning when you follow a tested recipe.
Low-acid foods need more care. Meat, poultry, fish, beans, plain vegetables, soups, and stews require pressure canning if you want them shelf stable. A water bath canner cannot safely process those foods. This is one of the most important food preservation rules a prepper can learn.
A reliable guide matters here. Random online recipes can leave out details that affect safety. A tested source such as the Ball Complete Book of Home Preserving gives beginners a safer place to start, especially when learning canning for the first time.
When in Doubt, Throw It Out
No jar, bag, bucket, or freezer meal deserves blind trust. Bulging lids, leaking jars, mold, strange smells, unexpected gas, slime, heavy discoloration, or damaged packaging all deserve caution. Food preservation should increase security, not create a hidden health risk.
Good labeling reduces guesswork. Write the food, date, method, and any useful batch notes on each package. Rotate your food before quality drops. Open older items during normal meals so you learn what stores well and what does not.
Food safety does not need to feel complicated. It does require discipline. Clean work, correct methods, dry storage, good labels, and honest judgment will prevent many of the mistakes that ruin preserved food.

Canning: Water Bath vs Pressure Canning
Canning gives preppers a way to turn fresh food into shelf-stable food, but it only works safely when you use the right method. The main choice comes down to water bath canning or pressure canning. They do not do the same job.
Water bath canning uses boiling water to process high-acid foods. Pressure canning uses higher temperatures under pressure to process low-acid foods. That difference matters because low-acid foods can support dangerous bacteria if you process them the wrong way.
Water Bath Canning
Water bath canning works best for high-acid foods. That usually means jams, jellies, many fruits, pickles, relishes, and properly acidified recipes. It can be a good starting point because the equipment costs less and the process feels less intimidating than pressure canning.
This method suits preppers who garden, shop seasonal fruit sales, or want to preserve simple pantry items. A few jars of jam will not feed a family through a long emergency, but water bath canning still has value. It helps you practice clean work, jar handling, labeling, and rotation.
Water bath canning has limits. It does not safely preserve meat, plain vegetables, beans, soups, stews, or other low-acid foods. Do not guess at acidity, and do not alter tested recipes unless the instructions clearly allow it. Small changes can affect safety.
Ball Mason jars fit naturally here because they work for both water bath and pressure canning when used correctly. A supply of Mason jars can help you practice with small batches before you build a larger canning routine.
Pressure Canning
Pressure canning handles the foods that matter most for serious meal planning. Meat, poultry, fish, beans, plain vegetables, chili, broth, soups, and many complete meals need pressure canning if you want them shelf stable.
This method can make a pantry far more useful. Rice and beans provide calories, but pressure-canned meat, broth, vegetables, and beans can turn basic staples into real meals. It also reduces dependence on freezer space, which matters during outages and long-term disruptions.
Pressure canning has a steeper learning curve. You must understand venting, pressure, altitude, processing time, jar size, headspace, and cooling. That does not make it unsafe. It means you need tested instructions and steady habits.
A Presto Pressure Canner can make sense for beginners who want a practical entry point. An All American Pressure Canner costs more, but it appeals to people who plan to can often and want heavy-duty equipment. Either way, the canner matters less than the skill. Learn the process before you trust full shelves of home-canned food.
The Prepper Value of Canning
Canning turns perishable food into food you can store without electricity. That makes it especially useful for anyone concerned about storms, blackouts, or freezer failure. It also lets you preserve food in meal-friendly forms, not just raw ingredients.
The best approach starts small. Can one tested batch, label it clearly, and eat it within a normal rotation. Learn how your household uses those jars. Then build from experience, not from panic buying supplies.
Canning rewards careful preppers. It punishes shortcuts. Follow tested recipes, use the correct method, and treat food safety as part of the skill.

Dehydrating Food
Dehydrating is one of the most useful food preservation skills for preppers because it saves space, reduces weight, and turns everyday foods into shelf-stable ingredients. It works by removing enough moisture to slow spoilage and make food harder for bacteria, yeast, and mold to use.
This method works especially well for fruit, vegetables, herbs, mushrooms, soup mixes, and some lean meats. It also fits small homes because dried food takes up far less room than jars or freezer containers. A few pounds of fresh produce can shrink into a compact jar, pouch, or Mylar bag.
Dehydrating does not suit every food. High-fat foods can go rancid. Some cooked meals dry poorly. Thick pieces may dry on the outside while trapping moisture inside. That trapped moisture can ruin the whole batch later, especially if you seal it too soon.
What Dehydrating Does Well
Dehydrated food helps turn basic staples into meals. Dried onions, peppers, carrots, tomatoes, mushrooms, and herbs can add flavor to rice, beans, pasta, soups, and stews. That matters when a pantry leans heavily on dry goods.
Fruit also works well. Apples, berries, peaches, bananas, and citrus can become snacks, oatmeal additions, or ingredients for baking. Dried herbs can support cooking when fresh herbs are not available.
For bug out bags, camping, and short-term evacuation food, dehydration offers another advantage. It creates lightweight food that travels better than cans or glass jars. You still need water to rehydrate much of it, so it should support your wider water storage for preppers plan.
Dehydrating as a Skill
Good dehydrating takes more than putting food on trays. Cut pieces evenly so they dry at the same rate. Blanch vegetables when the food calls for it. Dry food fully before storage. Let dried fruit condition in a jar for several days so remaining moisture can balance out before final packing.
A dedicated dehydrator gives you better control than an oven in most homes. A COSORI food dehydrator can help beginners practice with fruit, vegetables, herbs, and simple pantry ingredients without taking over the kitchen. A practical guide such as The Dehydrator Bible can also help readers learn drying times, food prep, and ways to use dried foods in real meals.
Storage matters after drying. Use airtight jars for short-term use, or Mylar bags with oxygen absorbers for longer storage when the food is dry enough. Label every batch with the food, date, and any prep notes. Then test it later by eating it, cooking with it, and learning what your household actually likes.

Vacuum Sealing
Vacuum sealing helps preppers protect food from air, moisture, freezer burn, and messy storage. It will not make food last forever, but it can improve storage life when you use it with the right foods and the right expectations.
This method works best for freezer food, dehydrated food, dry goods, snacks, meal kits, and short-to-medium pantry storage. It also helps organize bulk purchases into household-sized portions. Instead of freezing a large pack of meat as one block, you can divide it into meals, label each bag, and rotate it more easily.
A FoodSaver vacuum sealer fits naturally into this kind of routine. It can help reduce freezer burn, protect dehydrated ingredients, and keep dry items organized. You will also need vacuum sealer bags if you plan to use the method regularly, so factor that ongoing cost into your food preservation plan.
Where Vacuum Sealing Helps Most
Freezer storage gives vacuum sealing its clearest value. Removing air helps protect meat, fish, poultry, vegetables, bread, and prepared meals from freezer burn. That can save money when you buy in bulk or take advantage of seasonal sales.
Vacuum sealing also works well with dehydrated food for shorter storage periods. Dried fruit, vegetables, herbs, and jerky can all benefit from better packaging, as long as the food is dry enough before sealing. Moisture trapped inside a sealed bag can still cause spoilage.
Meal kits offer another practical use. You can seal rice with seasoning, dried vegetables, and other dry ingredients in one package. That makes storage neater and helps you build simple meals instead of loose pantry parts.
What Vacuum Sealing Does Not Do
Vacuum sealing is useful, but it is not a substitute for safe preservation. It does not replace pressure canning for low-acid foods, make wet food shelf stable, or remove every bit of oxygen. It also does not protect food from heat, rodents, sharp edges, or poor rotation.
Some foods need extra care. Powdery foods can interfere with the seal. Sharp pasta can puncture bags. Soft foods can crush under suction. Moist foods may need partial freezing before sealing so liquid does not get pulled into the machine.
Treat vacuum sealing as one tool in a larger system. It works well for freezer organization, dry storage, and everyday rotation. For serious long-term dry goods, Mylar bags with oxygen absorbers usually make more sense than standard vacuum sealer bags.

Freeze Drying
Freeze drying offers one of the longest-lasting forms of food preservation when you package the food correctly. It removes moisture at low temperatures, which helps preserve flavor, texture, and nutrition better than many other methods.
For preppers, the appeal is obvious. Freeze-dried food is light, shelf stable, and useful for long-term storage. It can work well for fruit, vegetables, eggs, dairy, lean meats, and complete meals. It also helps families preserve foods that match their normal diet instead of relying only on commercial emergency meals.
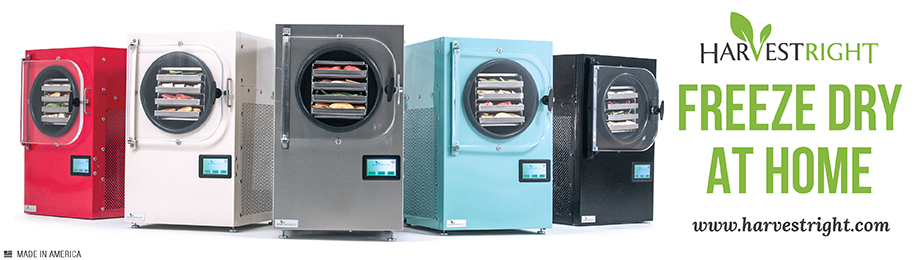
A Harvest Right home freeze dryer can make sense for serious food storage plans, especially for large families, homesteaders, gardeners, hunters, or people with special dietary needs. It gives you control over ingredients and portion sizes. It also lets you preserve leftovers and bulk purchases in a form that stores well.
Where Freeze Drying Works Best
Freeze drying shines when you want lightweight food with a long shelf life. Fruit keeps its color and texture well. Vegetables can rehydrate into soups, casseroles, rice dishes, and pasta meals. Cooked meals can become emergency food that your household already recognizes.
This method also helps with variety. Many long-term food plans rely heavily on dry staples. Freeze-dried eggs, vegetables, meat, cheese, and fruit can make those staples easier to turn into meals. That matters during an extended emergency, when morale and appetite can drop.
Freeze-dried food still needs proper storage. Use Mylar bags, oxygen absorbers, and sturdy containers when storing it for the long term. Label each package clearly. Write down the food, date, serving size, and rehydration notes so you do not have to guess later.
The Limits of Freeze Drying
Freeze drying costs far more than most other preservation methods. The machine, bags, oxygen absorbers, trays, power use, and maintenance all add up. It also takes time. A single batch can run for many hours, and some foods need prep before and after the cycle.
Power dependence matters too. A freeze dryer helps you build supplies before trouble starts, but it will not help much during a power outage unless you have enough backup power to run it. That makes it a planning tool, not an emergency appliance.
Freeze drying also requires practice. Some foods work better than others. Fatty foods can still go rancid. Sugary foods may stay sticky. Large pieces can dry unevenly. You need to test batches, package them well, and eat samples later to learn what stores best.
Freeze drying can become a strong part of a prepper food plan, but it should not be the first skill every beginner chases. Learn the lower-cost methods first. Then consider freeze drying if your budget, storage goals, and household needs justify it.
Fermentation
Fermentation is one of the oldest food preservation methods, and it still deserves a place in a prepper pantry. It uses salt, acidity, and beneficial microbes to preserve food while changing its flavor and texture. That makes it different from canning, freezing, or drying.
This method works best for vegetables such as cabbage, cucumbers, carrots, peppers, onions, and garlic. It can also support foods like sourdough, yogurt, kefir, and some sauces, depending on what you want to learn. For most preppers, fermented vegetables offer the easiest starting point.
Fermentation has a practical advantage that fits preparedness well. It does not require expensive equipment. A clean jar, salt, water, vegetables, and a basic understanding of the process can get you started. It also adds flavor to storage meals that might otherwise become repetitive.
A reliable guide such as The Art of Fermentation can help beginners understand salt ratios, timing, safe signs, and common problems. Fermentation looks simple, but good results come from learning what normal activity looks like and what warning signs deserve caution.
Why Fermentation Helps a Prepper Pantry
Fermented foods can add sharpness, crunch, and variety to stored meals. Rice, beans, canned meat, and dry staples become easier to eat when the pantry includes strong flavors. A small serving of sauerkraut, fermented peppers, or pickled-style vegetables can make a plain meal feel more complete.
Fermentation also helps preserve seasonal vegetables without relying on power. That matters for gardeners and anyone who buys produce in bulk. A cabbage harvest can become several jars of sauerkraut. Extra peppers can become a fermented hot sauce. Small amounts of mixed vegetables can become useful side dishes instead of waste.
This method will not replace canning or Mylar storage. Many ferments need cool storage after the active ferment slows down. Some need refrigeration for best quality. Shelf life varies by recipe, salt level, temperature, and cleanliness. Treat fermentation as a useful layer, not a complete food storage plan.
Fermentation Requires Observation
Fermentation rewards attention. You need to watch bubbles, smell, color, texture, brine level, and pressure. Vegetables should stay below the brine. Jars may need burping unless you use a proper fermentation lid. Warm rooms speed the process. Cool rooms slow it down.
Salt matters. Too little salt can allow spoilage. Too much can stop a ferment from developing well. Clean tools matter too, but sterile conditions are not the goal. You want the right microbes to win.
Start with small batches. A single jar of sauerkraut, carrots, or peppers will teach more than a shelf full of experiments. Taste it as it develops, keep notes, and learn what your household will actually eat.
Fermentation brings life and variety to food preservation. It also teaches patience, judgment, and careful handling, which are exactly the habits that make food preservation skills more reliable over time.

Freezing Food Effectively
Freezing is not the most rugged food preservation method, but it remains one of the most useful. It protects food quality, saves time, and helps preppers build supplies from normal grocery shopping. A well-managed freezer can hold meat, fish, vegetables, bread, butter, cheese, fruit, and prepared meals that make everyday resilience much easier.
The weakness is obvious. Freezing depends on electricity. That does not make it worthless. It means you need to treat freezer storage as part of a broader plan, not the whole plan. A full freezer can support your household through busy weeks, storms, illness, job disruption, or short supply problems. A long outage turns that same freezer into a countdown.
Good freezer management starts before the food goes in. Divide food into meal-sized portions. Use flat packs when possible, because they freeze faster and stack better. Remove excess air, label everything, and keep an inventory so older food does not disappear at the bottom.
What Freezing Does Well
Freezing works especially well for foods you already cook often. Meat bought on sale can become several meals. Garden vegetables can be blanched and frozen for later use. Leftover soup, chili, stew, rice dishes, and casseroles can become quick meals during stressful weeks.
This method also helps preserve food texture better than many shelf-stable options. Frozen berries, vegetables, bread, and cooked meals often feel closer to fresh food than dehydrated or canned versions. That makes freezer storage useful for normal life, not just emergencies.
Vacuum sealing can improve freezer storage by reducing air exposure and freezer burn. It works well for meat, fish, vegetables, and batch-cooked meals. Use sturdy bags, leave room for expansion where needed, and label each package with the date and contents.
Prepare for Freezer Failure
Every prepper with a freezer needs a power outage plan. Know what you would cook first, what you would can if you had time and equipment, and what you would move to a backup power source. A generator, solar generator, or battery system may buy time, but it should not replace planning.
Keep the freezer full, but organized. A full freezer stays cold longer than a nearly empty one. If you do not have enough food to fill the space, use frozen water containers to add thermal mass. They can help hold temperature and provide backup water after thawing.
Freezing also needs more thought about grid down survival and emergency cooking without power. If the power fails, you may need to cook thawing food fast, preserve some of it another way, or share a meal before it spoils. That is not ideal, but it beats losing everything because you had no plan.
Freezer storage belongs in a prepper pantry, but it needs limits. Use it for convenience, bulk buying, and short-to-medium storage. Support it with canned food, dehydrated ingredients, Mylar-packed dry goods, and other methods that do not depend on the grid.

Root Cellaring and Cool Storage
Root cellaring sounds old-fashioned, but the idea still works. Some foods store well when you give them the right temperature, humidity, darkness, and airflow. You do not need a traditional underground cellar to use the principle.
This method works best for foods such as potatoes, onions, garlic, winter squash, apples, carrots, beets, cabbage, and some turnips. It can help gardeners and bulk buyers hold food for weeks or months without using jars, bags, electricity, or complicated equipment.
Cool storage has limits. Every crop has its own storage needs. Potatoes like cool, dark, humid conditions. Onions and garlic need drier airflow. Apples can release ethylene gas, which can shorten the life of some nearby produce. Squash prefers a warmer and drier space than many root crops.
Start With the Space You Have
Many homes already have possible cool-storage areas. A basement, garage, crawl space, pantry, mudroom, insulated box, spare refrigerator, or cool closet may work for certain foods. The goal is not perfection. The goal is learning which foods keep well in your actual home.
Check temperature swings before you trust a storage area. A garage may work during mild weather and fail during a hard freeze. A basement may stay cool but feel too damp. A pantry may stay dry but run too warm. Small thermometers and regular checks will teach you more than guesswork.
Storage containers also matter. Crates, baskets, paper bags, cardboard boxes, and ventilated bins can all work for different foods. Avoid sealing fresh produce in airtight containers unless the food and method call for it. Trapped moisture often leads to rot.
A good root cellaring book can save a lot of trial and error because each crop has different needs. Root Cellaring: Natural Cold Storage of Fruits & Vegetables is a useful guide for learning crop-by-crop storage requirements, root cellar setups, and ways to use cool spaces in ordinary homes.
Inspect, Rotate, and Separate
Cool storage requires regular inspection. One rotten potato or apple can spoil others nearby. Check stored produce often, remove damaged items, and eat the weakest food first.
Separation helps too. Keep onions away from potatoes. Store apples away from foods that spoil faster from ethylene exposure. Keep squash where it stays dry. Do not let damp produce sit against walls, concrete, or cardboard for too long without checking it.
Root cellaring and cool storage tie in to our bugging in guide for preppers because they reduce power dependence. They also help turn seasonal food into usable pantry strength. The skill comes from observation. Store a small batch, track what lasts, and improve the setup before you rely on it.

Mylar Bags and Oxygen Absorbers for Dry Goods
Mylar bags and oxygen absorbers help preppers store dry food for the long term. This method works best for foods with low moisture and low oil content. Rice, oats, dry beans, lentils, pasta, powdered milk, some flour, dehydrated foods, and freeze-dried foods all fit this category when packaged correctly.
The basic idea is simple. Mylar protects food from light and helps block air. Oxygen absorbers remove oxygen from inside the sealed bag. A food-grade bucket then protects the bag from pests, punctures, crushing, and rough handling.
This method does not preserve wet food. It does not fix food that already has too much moisture. It also does not make oily foods last forever. Brown rice, whole wheat flour, nuts, and similar foods contain more natural oils, so they have shorter storage lives than white rice, dry beans, or rolled oats.
Where Mylar Storage Works Best
Mylar storage works well for bulk staples. A prepper can buy dry goods in larger bags, divide them into practical portions, and store them in a way that protects against oxygen, light, and pests. That can make food storage cheaper and easier to manage over time.
Smaller bags often make more sense than one giant bag. A five-gallon bucket full of rice has value, but opening it exposes the whole supply. Several smaller Mylar bags inside one bucket give you better control. You can open what you need and leave the rest sealed.
A good setup usually includes Mylar bags and oxygen absorbers, food-grade storage buckets, and clear labels. Gamma Seal lids can help when you use buckets for foods you access regularly, although standard lids can also work well for sealed long-term storage.
The Basic Mylar Process
Start with dry food. Moisture is the enemy here. Fill the Mylar bag, leave enough room to seal it, add the correct oxygen absorber, and seal the bag with steady heat. Then check the seal and store the bag inside a bucket or other protective container.
Label each package before it goes into storage. Write the food, date, weight, and any useful notes. A digital kitchen scale helps you make consistent portions and track how much food you actually have.
Do not rush the process. Oxygen absorbers begin working once exposed to air, so prepare your bags, labels, buckets, and sealer before opening the absorber packet. Good organization prevents wasted supplies and weak seals.
Mylar storage is useful alongside the prepper food list. Dry staples provide the foundation, but they need water, fuel, cooking skills, and supporting ingredients. A pantry full of rice and beans becomes far more useful when it also includes canned meat, dehydrated vegetables, seasonings, and a clear cooking plan.
Choosing the Right Preservation Method
Food preservation works best when you match the method to the food, the storage goal, and the way your household actually eats. A freezer full of meat, a shelf of canned beans, a bucket of rice, and a jar of fermented vegetables all solve different problems.
The mistake is looking for one perfect method. There is not one. Each method has strengths, costs, limits, and safety rules. A resilient prepper pantry uses several methods together.
Match the Method to the Food
Meat needs careful handling. Freezing works well for short-to-medium storage, especially when vacuum sealed. Pressure canning can turn meat, broth, chili, and stew into shelf-stable meals. Freeze drying can also work, but the equipment cost puts it out of reach for many beginners.
Fruit gives you more options. You can dehydrate it, freeze it, water bath can it, or freeze dry it. Apples can also store for a while in cool conditions if you choose the right varieties and inspect them often.
Vegetables vary widely. Some can be dehydrated. Many can be frozen after blanching. Low-acid vegetables need pressure canning if you want them shelf stable. Cabbage, cucumbers, carrots, peppers, and onions can also work well for fermentation.
Dry goods belong in Mylar bags, buckets, jars, or other dry storage systems. Rice, beans, oats, lentils, and pasta provide the backbone of many prepper pantries. They also need protection from moisture, oxygen, pests, and heat.
Root crops and storage crops deserve their own plan. Potatoes, onions, garlic, squash, apples, cabbage, and carrots may keep well in cool storage if your home gives them the right conditions.
Match the Method to Your Situation
Budget matters. Water bath canning, fermentation, and basic cool storage can cost very little. Pressure canning, dehydrating, vacuum sealing, and freeze drying require more equipment. That does not make one method better than another. It means you should start where your money and skill level make sense.
Storage space matters too. Jars take shelf space. Buckets need floor space. Freezers need power and room. Dehydrated and freeze-dried foods store compactly, but they need good packaging and enough water for use later.
Your climate and home layout also affect the decision. A cool basement may make root storage easy. A hot garage may ruin dry goods. A small apartment may favor dehydrated foods, Mylar bags, and compact pantry storage over large freezers or rows of jars.
Diet matters most of all. Do not preserve food your household will not eat. Long-term storage should support real meals, not just impressive shelves. The best method is the one that keeps safe food available in a form your family will actually use.
Build Redundancy Into Your Food Plan
Redundancy gives preppers options. If the power goes out, shelf-stable food still matters. When jars run low, dry goods can carry the pantry. If rice and beans become repetitive, fermented vegetables, canned meat, dehydrated ingredients, and preserved sauces can improve meals.
This is where food preservation ties into our bugging in guide for preppers. A strong home pantry should not depend on one appliance, one method, or one type of food. It should give you several ways to feed your household when normal routines get harder.
The same lesson shows up in many common prepper mistakes. Buying gear without learning the skill creates false confidence. Storing food without eating and rotating it creates waste. Relying on one preservation method creates a single point of failure.
Choose one method to practice first. Use it with familiar food. Eat the result. Then add another method when you are ready. That slow, steady approach builds a food system you can trust.

Common Food Preservation Mistakes
Food preservation rewards careful habits. It also exposes weak ones. Most failures do not come from one dramatic mistake. They come from small shortcuts repeated often enough to create unsafe food, wasted money, or a pantry nobody wants to use.
Good preppers do not need to fear food preservation. They need to respect it. A safe routine, tested instructions, clean work, clear labels, and honest judgment will prevent many problems before they start.
Using the Wrong Method for the Food
This is the mistake that matters most. Low-acid foods need pressure canning if you want them shelf stable. Meat, fish, poultry, beans, plain vegetables, soups, and stews do not belong in a water bath canner.
The same rule applies across other methods. Mylar bags work for dry food, not moist food. Vacuum sealing helps freezer storage, but it does not make wet food shelf stable. Dehydrating only works when food dries fully before storage.
Each method has a job. Learn that job before you trust the result.
Preserving Food You Do Not Eat
A pantry should support real meals. It should not become a museum of good intentions. If your household hates sauerkraut, ten jars of fermented cabbage will not help much. If nobody cooks lentils now, a bucket of lentils may sit untouched for years.
Start with familiar foods. Preserve ingredients your household already uses. Then add variety slowly. A small test batch can teach you more than a large project that nobody wants to eat.
Skipping Labels and Dates
Unlabeled food creates waste. A jar of mystery sauce, a bag of unknown powder, or a freezer pack with no date will eventually become a problem. During an emergency, you do not want to guess what something is or how long it has been stored.
Labels do not need to look fancy. Write the food, date, method, and any useful notes. For freezer meals, include reheating instructions. For dehydrated foods, add rehydration notes if needed.
Ignoring Moisture
Moisture ruins dry storage. It can spoil dehydrated food, weaken Mylar storage, damage dry goods, and encourage mold. Food that feels dry on the surface may still hold moisture inside.
Let dehydrated foods cool before packing. Condition dried fruit when needed. Store dry goods away from damp floors and walls. Check buckets, bags, and jars for signs of condensation, pests, or damage.
Trusting Gear Instead of Skill
A pressure canner, dehydrator, freeze dryer, vacuum sealer, or stack of buckets will not protect food by itself. Gear only helps when you know how to use it.
Practice before you depend on the result. Run small batches. Read instructions. Keep notes. Open stored food later and test the quality. This approach costs less than ruining a large batch, and it builds confidence the right way.
Storing Everything in One Form
One freezer, one shelf of cans, or one stack of buckets can create a weak system. Freezers need power. Cans need space. Dry goods need water and cooking fuel. Ferments need cool storage. Dehydrated food needs careful packaging.
A better pantry uses layers. Store some food ready to eat, some ready to cook, some dry, some canned, some frozen, and some preserved in low-tech ways. That kind of mix supports grid down survival better than any single method.
Practicing Your Food Preservation Skills
Food preservation skills become useful through practice, not theory. Reading about canning, dehydrating, fermentation, freezing, and dry storage gives you the map. Repeating the process with real food teaches the judgment.
Start small. A single batch of dehydrated apples, one jar of fermented vegetables, one freezer meal, or one bucket of dry goods in Mylar will teach more than a cart full of supplies left unopened. Small projects also keep mistakes cheap.
Practice with food your household already eats. That keeps the work grounded. If you cook beans every week, learn how to store dry beans well. If you use onions, peppers, and carrots in soups, try dehydrating those first. When your family already likes the food, rotation becomes easier.
Build a Seasonal Rhythm
Food preservation works best when you connect it to normal life. Preserve food when it becomes cheap, abundant, or at risk of waste. That could mean garden vegetables, farmers market deals, bulk meat sales, hunting season, or extra produce from a neighbor.
Seasonal habits make preparedness more sustainable. Summer fruit can become canned preserves, frozen portions, or dehydrated snacks. Fall root crops can move into cool storage. Discounted meat can become freezer portions or pressure-canned meals. Dry goods can go into Mylar whenever you find a good sale.
This approach supports financial preparedness for preppers because it builds supplies without relying on panic buying. It also helps reduce waste, which matters when food prices stay high.
Test What You Store
Do not treat preserved food like a display. Open it. Cook with it. Rehydrate it. Serve it during normal meals. This tells you what worked, what failed, and what your household will actually eat.
Testing also reveals gaps. Dehydrated vegetables may need more cooking time than expected. A freezer meal may need clearer reheating instructions. A fermented food may taste better after a shorter ferment. A Mylar-packed staple may need more seasonings, sauces, or preserved meat to become a proper meal.
Your notes matter. Write down the food, date, method, batch size, storage conditions, and result. Add simple comments such as “rehydrated well,” “too salty,” “family liked it,” or “store in smaller portions next time.” Those notes become your personal food preservation manual.
Learn Before You Rely on It
An emergency is the wrong time to learn a preservation method from scratch. Pressure canning, fermentation, dehydration, freeze drying, and Mylar storage all have details that matter. Practice now, while mistakes cause inconvenience rather than real hardship.
Food preservation also connects with other skills. Stored food still needs safe water, fuel, cooking knowledge, and a way to handle waste. That is why this skill fits naturally beside water purification skills for preppers, fire starting skills for preppers, and emergency cooking without power.
The goal is steady improvement. Add one method, one food, and one repeatable habit at a time. Over months and years, those small projects can build a pantry that feels practical, familiar, and dependable.

Food Preservation Is a Skill, Not a Shopping List
Food preservation gives preppers more than longer shelf life. It gives them control. A household that can preserve food can make better use of seasonal harvests, bulk buys, meat sales, garden surplus, and everyday leftovers before they go to waste.
The real value comes from experience. A canner on a shelf does not create food security. A dehydrator still in the box will not improve the pantry. Buckets, bags, jars, and books only help when you use them, test the results, and build repeatable habits.
Start with one method that fits your life. Dehydrate foods you already cook with. Store dry goods in Mylar. Learn safe water bath canning with tested recipes. Practice freezer organization before the next storm season. Add pressure canning, fermentation, root cellaring, or freeze drying when you feel ready.
A strong prepper pantry uses layers. Shelf-stable jars, dry staples, dehydrated ingredients, frozen meals, fermented vegetables, cool-stored produce, and properly packed bulk foods all bring different strengths. Together, they create a food system that can handle more stress than any single method alone.
Food preservation also makes preparedness more sustainable. It can save money, reduce waste, improve meal variety, and help your household eat stored food before it expires. That matters during emergencies, but it matters during normal life too.
The best time to learn is before you need the skill. Build slowly, keep notes, rotate what you store, and focus on food your household will actually eat. Over time, food preservation can turn a basic pantry into a practical, resilient system that supports real self-reliance.
Prepper's Paradigm is a participant in the Amazon Services LLC Associates Program and other affiliate programs. This means we may earn a commission if you make a purchase through links on our site, at no extra cost to you. For more details, please see our disclosure notice.


